Sunday, 24 February 2013

Cinnamon Rolls!!

After my King Cake experiment, I couldn't get cinnamon rolls out of my mind.  I had to try and make the real thing.

I ended up combining recipes from two wonderful bakers, along with some tips and tricks from a few others*.   These are cinnamon rolls, these are serious, and they need to be amaze-ing.  Especially considering how long you have to wait to eat one!

Set aside your Sunday, friends, these require commitment.  Okay, so that was a tad exaggerated. Don't be like me, though, and not start them until after 1 pm.  I ruined my dinner.

Dough
1 package active dry yeast
1/2 tsp plus 1/4 cup granulated sugar
1/4 warm water
1/2 cup milk
1/2 cup butter, unsalted
2 tbsp brown sugar
1 tsp vanilla extract
1 egg
1 egg yolk
2 3/4 cups sifted all purpose flour, plus more for kneading
3/4 tsp salt

Cinnamon-y filling goodness
1/2 cup granulated sugar
1/2 cup brown sugar
1 tbsp cinnamon
1/4 cup melted butter, unsalted

  • In a large bowl, combine yeast and 1/2 tsp sugar.  Add the warm water and stir. Set aside for 10 mins.
  • Heat milk in small saucepan with butter until hot, but not boiling.
  • Remove milk from heat and let cool.
  • In a large bowl, sift flour and add salt.
  • Add the white and brown sugar to the yeast mixture and stir.  Add the warm milk and butter mixture, the eggs, and vanilla.  Mix well. 
  • Slowly add in the flour, one cup at a time, mixing with a wooden spoon.  Dough will be slightly sticky.
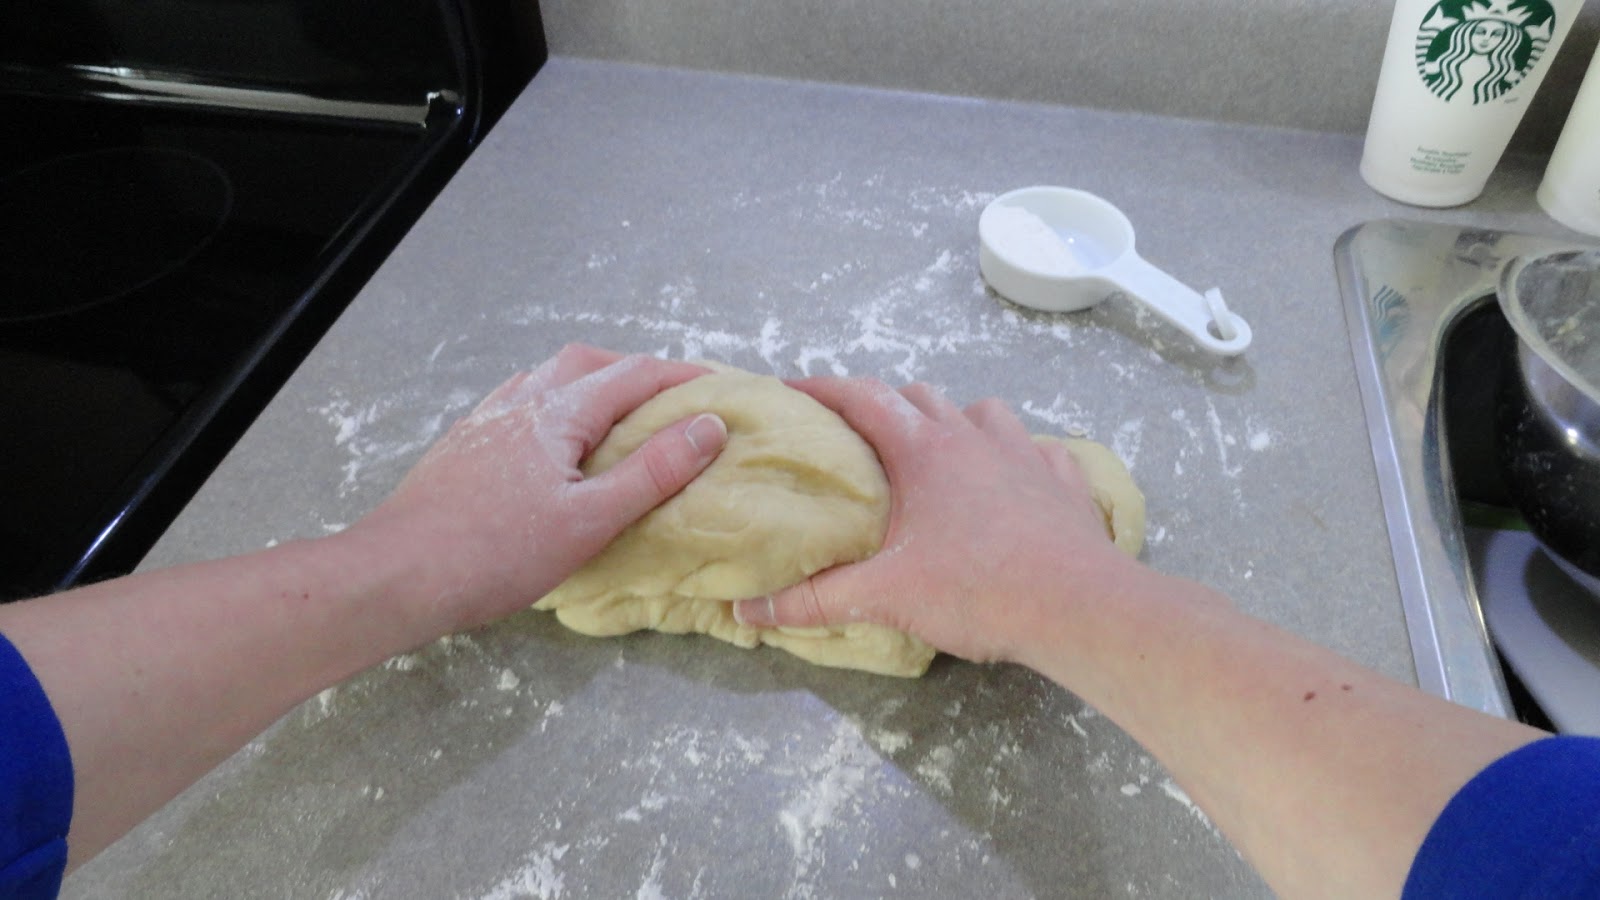
  • On a well floured surface, knead the dough for several minutes, adding several tbsp of flour as you knead.

  • Place the dough ball in a large bowl, well greased with oil.  Roll the dough around in the oil until well covered.  Cover bowl with plastic wrap, and place a tea towel over the bowl.  Put bowl in oven and let rise for about 2 hours. 
  • Place dough on well floured surface and knead for about 5 minutes, adding in 2-3 tbsp of flour. 
  • Melt 1/4 cup butter in a small saucepan. 
  • Roll dough out into a 10x20 rectangle and spread melted butter across the surface. 
  • Combine the sugars and cinnamon in a small bowl and pour over the butter, patting down. 

  • Starting with one short end, roll up the dough tightly, pulling lightly on each end as you go to keep it nice and long. Pinch the ends together to make a seam. 
  • With the seam side down, cut the roll into 8 equal pieces. 
  • Place each piece, with the cut side up, spaced equally out, in a greased 9x13 pan. 
  • Bake at 375 degrees for 30 minutes.  Cinnamon rolls should be puffed up, bubbling, and brown.


*Adapted from Joy the Baker and A Clockwork Lemon, along with helpful tips and tricks from Mennonite Girls Can Cook, and my own experience making King Cake.


Sunday, 17 February 2013

Brown Sugar Oatmeal Squares

One of my favourite after school snacks from childhood were these soft, buttery, sugary oatmeal squares.... I have the recipe my mom used - but I failed time and again to recreate it. It just didn't work, the squares just crumbled into bits.  Delicious, rich, buttery-sugar bits - but not what I was going for.  Finally, after adding a couple of twists to the original, I just might have satisfied my 20 year old craving.  I might have to make a second batch just to be sure...


Brown Sugar Oatmeal Squares

3/4 cup unsalted butter
1 cup brown sugar
1 cup flour
2 cups rolled oats
1 tsp baking powder
1 egg
1 tsp vanilla

Melt butter in a small saucepan on low heat.
Combine brown sugar, oats, baking powder, and flour.
Pour melted butter into oat mixture.  Add vanilla and egg.
Mix well and pat into a greased 8x8 inch pan.

Bake at 350 degrees for 30-35 minutes or until centre is firm.


Tuesday, 12 February 2013

Mardi Gras King Cake

Happy Mardi Gras!

I have been intrigued by the idea of a King Cake ever since my father sent a photo of one from his travels in the southern United States.  So this year, I decided to try my hand at making one.


A King Cake is a traditional ring of cinnamon roll bread topped with purple, green, and gold icing or sugar (the traditional colours of Mardi Gras).  The origin of the King Cake is religious in nature - it is named after the three kings of biblical lore who visited the Christ child.  It is traditionally served between Twelfth Night and Mardi Gras, or Fat Tuesday, the day before the beginning of Lent.  The tradition was brought to the southern United States by colonists from France and Spain, and is served as part of Mardi Gras celebrations.  It traditionally has a small plastic baby hidden inside (to represent the baby Jesus).  

This was my first effort baking with yeast - so I was a little apprehensive, to say the least.   I didn't think it would turn out, actually, as the recipe calls for the dough to double in size, and mine certainly did not do that. However, all is well that ends well, and it baked up beautifully!

King Cake

Pastry
1/2 cup milk
2 tbsp butter
1 package active dry yeast
1/3 cup warm water
1/4 cup granulated sugar
1 egg
3/4 tsp salt
1/4 tsp nutmeg
2 3/4 cups sifted all purpose flour

Filling
1/2 cup brown sugar
1 1/2 tsp cinnamon
1/4 cup all purpose flour
1/4 cup melted butter

Frosting
1/2 cup icing sugar
1 1/2 tsp water
Purple, Yellow, and Green coloured sugar crystals


1. Bring milk to a boil and add the 1/4 cup butter.  Remove from heat and let cool.   
2. In a large bowl, dissolve yeast in the warm water.  Stir in 1 tbsp of the sugar to avoid frothing.  Let stand for about 10 minutes. 
3. Add the cooled milk and butter mixture to the yeast.  Whisk in the egg.  Add in the rest of the sugar, the salt and nutmeg.  Add the flour one cup at a time until dough starts to pull together. 
4. Knead the dough for about 8-10 minutes on a lightly floured surface. 
5. Add about a 1/2 tsp of oil to a large bowl.  Roll the dough in the oil until coated.  Cover bowl with a damp cloth or plastic wrap, and let it rise in a warm place until doubled in volume, about 2 hours. 
6.  While waiting, make the filling.  Combine brown sugar, cinnamon, and flour.  Add the melted butter and mix loosely until crumbly. 
7. When the dough is ready, roll it out on a lightly floured surface into a large rectangle.  Sprinkle the filling over the dough and starting from one long end, roll it up tightly.  Place on a greased cookie sheet and wind around a glass mason jar to keep the shape, pushing the two ends together.  Let rise for an additional 45 minutes.
8. Bake in a preheated 375 degree oven for 25-30 minutes.  Allow to cool completely before frosting. 
9. Have fun decorating it with coloured sugar crystals!

Thursday, 7 February 2013

Sweetheart Chocolate Chip Cupcakes

It's a blustery stormy winter's evening and there is nothing good on t.v. What to do? Make cupcakes!
What's that you say? You don't want to end up eating a half dozen by the end of How I met your Mother?
Well, pshosh. Don't worry my friend, because I have just the cure for what ails you.
It's genius, really.  A recipe for just two cupcakes?  One for right now, and one for a half hour from now? Or, if you are feeling really sweet, then one for you, and one for your sweetheart.


I came across this recipe at One Bowl Vanilla Cupcakes for two, and it has been on my (long) list of things to try for quite some time now.

I was kinda craving chocolate tonight, though, so I added cocoa and chocolate chunks....oh, yeah.


Sweetheart Chocolate Chip Cupcakes 
adapted from How Sweet It Is

1 egg white
2 tbsp sugar
2 tbsp unsalted butter, melted
1/2 tsp vanilla
1/4 cup sifted all purpose flour
1/4 heaping tsp baking powder
1 tbsp cocoa
pinch of salt
1 tbsp milk
1 tbsp chocolate chips

Combine egg white and sugar in a small bowl.
Add in vanilla and melted butter.
Add flour, baking powder, salt, and cocoa.
Add milk, stir well.

Pour into two cupcake liners and bake for 12-15 minutes in a preheated 350 degree oven.


Tuesday, 5 February 2013

Best Damn Buttermilk Pancakes with Blueberry Sauce


This recipe makes the best damn pancakes ever. There are three important elements to a perfect pancake.  Light. Fluffy. Slightly sweet.  There are two mandatory ingredients - butter and buttermilk. If you are like me, and you don't keep actual buttermilk in your fridge at all times (I know, right?!)  you can always add a bit of lemon juice.  Or, if you are like me, you can make poor [wo]man's buttermilk - just add a splash of vinegar to the milk.  

There are also three essential rules: 

1. Sift the flour   
2. Do not overstir the batter  
3. Only flip the pancakes once

Makes about 10- 12 large fluffy pancakes. This recipe is easily halved to make a half dozen pancakes.


Best Damn Buttermilk Pancakes


1/2 cup unsalted butter, melted
2 cups sifted all purpose flour
2 cups buttermilk
1/4 cup granulated sugar
2 tsp baking powder
1 tsp baking soda
1 tsp salt
2 eggs
2 tsp vanilla

Melt the butter in a small saucepan on low heat.  Set aside.
Preheat the grill or medium to large non stick frying pan.  Add a bit of margarine or butter to slightly grease it.
Sift the flour in a medium bowl with sugar, baking powder, baking soda, and salt.
In a large bowl, combine the butter, buttermilk, eggs, and vanilla.
Add the flour mixture all at once, mixing only until just combined.

Absolutely no rules for the size - make 'em as big as you want!!

Blueberry Sauce
1 1/2 cups frozen blueberries (or any kind of berry)
1/2 cup table syrup** or to taste

Thaw the berries in a small saucepan along with the syrup.
Add a tiny bit of water if necessary.
Ready when bubbling!

Monday, 28 January 2013

Red Velvet Vanilla Marble Cake

Valentine's Day dessert, Christmas potluck, Ruby wedding anniversary, or maybe you just love red....this cake is your style.  This is my second attempt at both a red velvet cake and a marble cake so I did some research before I dove in.  I borrowed bits and pieces from several different recipes and modified bits of others until I found a combination I thought would work.


I had two goals for this recipe - first, for the red velvet cake to be moist and flavourful, and second, a lovely marbled effect between the vanilla and the red velvet.

I started with Joy the Baker's simple vanilla cupcake recipe.  Her advice was to double the batch to make a layer cake, but I had decided to make a 9 x 13 cake so I opted to keep it simple and single. For the red velvet, I doubled the amount of butter that was called for in most recipes, as the last one I tried turned out dry and tasteless. I toyed with the idea of adding a tbsp of vegetable oil, but decided against it.   I also didn't want a lot of cocoa in it, so I only used 1tbsp of cocoa to 2 tbsp of red food colouring.

Ok, enough rambling.  It was a success in terms of a moist and delicious red velvet cake, and the marbling turned out rather well - a nice contrast between the red and the vanilla. The vanilla butter cake was superior,  and I will definitely use this recipe next time I make vanilla cupcakes.


Vanilla Cake
Joy the Baker's Simple Vanilla Cupcakes

1 1/3 cups all purpose flour, sifted
3/4 tsp baking powder
1/4 tsp salt
1/2 cup unsalted butter, softened to room temperature
1 cup granulated sugar
2 eggs
2 tsp vanilla extract
1/2 cup milk

  1. Combine flour, baking powder and salt.  
  2. In another bowl, cream butter and sugar until fluffy. 
  3. Add eggs one at a time to the butter and sugar. Using an electric mixer, beat until well combined.
  4. Add the vanilla to the egg mixture, and then half of the flour mixture, continuing to beat. 
  5. Add the milk, followed by the rest of the flour mixture.  
  6. Set aside.
Red Velvet Cake

1 1/2 cups flour, sifted
1/2 tsp salt
1/2 cup unsalted butter, softened
1 cup granulated sugar
1 egg

1 tbsp cocoa
2 tbsp red food colouring
3/4 cup buttermilk
2 tsp vinegar
1 tsp baking soda

  1. Combine flour and salt in a small bowl.  Set aside
  2. In a medium sized bowl, cream butter and sugar until fluffy.  Add the egg, beating well to combine.
  3. In a small bowl, combine cocoa and food colouring until it forms a thick paste, and add to the butter and sugar. 
  4. Stir in the flour mixture and the buttermilk alternately, about half at a time, mixing in between.
  5. Add one tsp of the vinegar and the baking soda (Chemistry 101 - it will hiss and bubble), followed by the last tsp of vinegar. Stir well to incorporate.
  6. Pour the red velvet batter into a greased 9x13 inch pan.  It will be thick, you may have to use a spatula to move it into the corners evenly.  
  7. Pour the vanilla batter on top.
  8. Run a butter knife through the batter to create the marbled effect.  Don't be too cautious (I have learned from past mistakes), or you will not achieve the proper marbled effect.  Give it a good whirl.

Bake in a preheated 350 degree oven for 45-50 minutes, or until a cake tester inserted in the middle comes out clean.


Tuesday, 22 January 2013

Chocolate Chip Cookies with Browned Butter and Walnuts

I made these cookies for the first time for a long weekend at the cottage in the summer - I don't think they lasted an entire day - they were devoured within hours.  Earlier today I decided to make a batch of cookies for some friends who could use some cheery comfort food - these are perfect.

The browned butter adds a caramel-nutty flavour to the cookie - combine that with good quality semi-sweet chocolate chips and walnuts to make the perfect gourmet chocolate chip cookie.   Speaking of the wonders of browned butter, check out my previous post:  Banana Rum Cake with Browned Butter icing.  See below for tips on browning butter. 

I changed it up a bit the second time around - omitting the extra tbsp of butter, and a half cup of light brown sugar - although it reduces the richness of the cookie, they are every bit as tasty.  The next time I make these I am going to try half a cup of white granulated sugar and half a cup of brown sugar - I will let you know how it goes!


Chocolate Chip Walnut Cookies with Browned Butter
adapted from Joy the Baker

1 cup unsalted butter, softened
1 cup granulated sugar
1 1/2 tsp vanilla
1 tsp molasses
1 large egg
1 large egg yolk
2 1/4 cups all purpose flour, sifted
1 tsp salt
1 tsp baking soda
1/2 cup coarsely chopped walnuts 
1 cup semi-sweet chocolate chips (good quality)

Divide the butter into two halves.   In a small saucepan, brown 1/2 cup of the butter.  Cool in a small bowl.
Cream the remaining 1/2 cup butter with the granulated sugar until fluffy.  
Add the vanilla, molasses, and cooled browned butter, and cream together.  (If you like, you can add an additional 1/2 cup brown sugar if you like at this stage). 
Add the egg and egg yolk, and continue to beat. 
In a separate bowl, combine the sifted flour, salt, and baking soda. 
Add the flour mixture all at once to the egg and butter mixture. 
Fold in the chocolate chips and walnuts until mixed in evenly.


Preheat oven to 375 degrees F.  
Place dough in balls about 2 inches apart on cookie sheets.
This recipe makes about 2 1/2 dozen, depending on how large your cookies are.
Bake 12 minutes for medium sized cookies and up to 14 minutes for larger cookies. 


Allow to rest for 5 minutes on baking sheet and then remove to wire cooling rack.

Browned Butter?? What the heck is that?!
In a nut shell, browned butter is simply cooked butter.  In a small saucepan, melt butter.  The butter will start to foam, and make crackling noises.  Once the crackling noises subside, look out for the brown bits forming at the bottom of the pan. You will start to smell the nutty flavour as it cooks.  Remove the pan from heat and pour into a small bowl, ensuring that you scrape all the browned bits off the bottom of the pan.  Cool to room temperature.